Thursday 26 August 2010

A Purple Crayon Imagination

Purple Crayon


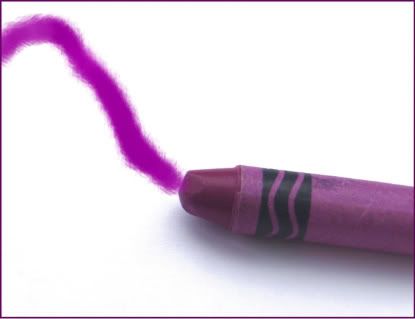
Over at The Redhead Riter, the Tell The Truth Thursday question posed today is "If you were a crayon, what color would you be?"

This got me thinking. Of course, my first thought was of the color blue. Blue is my favorite color. Deep aqua blue is the color of the sea; it's the color of swimming. Light blue is the color of the sky; it is the color of flying. Clear blue is the color of my five year old daughter's eyes; it is the color of innocence. Dark blue is the color of the night sky, lit by stars and the moon; it is the color of eternity. Blue is the color of freedom.

But my thinking on this subject went further. Yes, blue has a lot going for it, but this year, my life has been full of learning new things, trying out new adventures and having the courage to dream. And having the courage to dream means I am creating the world I want to live in, one step at a time. I really believe that if I can imagine it and dream it, then I can make it happen. And I really want my kids to believe this too. I want them to grow up knowing that they can create their own reality if they strive for what they want, and I want them to know that they are capable of great things. I want them to value their imaginations. So what color could possibly encompass all of these things?

That's when a children's story came to my mind, "Harold and the Purple Crayon" by Crockett Johnson. In the story, the little boy creates whatever he wants by drawing it with his purple crayon. The purple crayon represents his imagination which has the power to bring things into Harold's reality.

So that is the color I would have to be - purple. And I hope my children have the courage to be purple crayons too.

Tell The Truth Thursday

Tell The Truth Thursday


Where to buy "Harold and the Purple Crayon":
In the U.S.


In the UK:

Free Swatch Day at Spoonflower!

Spoonflower is having a "free swatch day" today. You can order a swatch of fabric (buy a design from their marketplace or make one with your own art) and it's free including shipping. I didn't have to pay shipping and I'm in the UK! (I had worried that shipping would only be free in the US, but that wasn't the case.) So it's completely free ($5 value) through noon tomorrow. It's a great way to get some quilt squares if you quilt or to get fabric for making pillows, but even better, it gives you an idea of how well your art or photography will print on one of the fabrics at Spoonflower.

Sunday 15 August 2010

Making A Princess Castle Cake

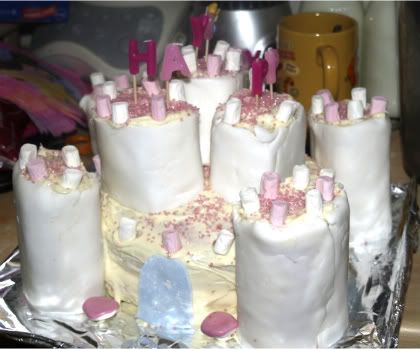
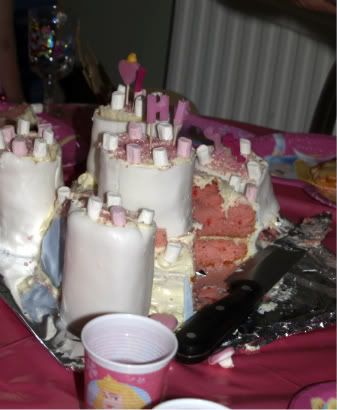
Bellas 5th Birthday Party Princess Castle Cake6


Our daughter's 5th birthday party was upon us and she wanted a princess party, complete with a princess cake. My husband and I decided to make a castle cake. Neither of us had a concrete plan on how we were going to make the cake. We both intended to make a practice one sometime before the day of the party to make sure we would have a plan in place for it, but, as often happens in large families, time got away from us and we wound up making the cake on the day of the actual party. (Actually, Robert started the night before the party, but the first cake he baked didn't come out right, so we let the kids just munch on it plain and scrapped the idea of using it for the castle cake.)

Fortunately, I had another cake mix in the cupboard. (It was a strawberry cake mix, one that we can't find in the UK unless we buy it online from American Soda.) Robert was about to bake the cake when he realized that we didn't have enough vegetable oil, so I made a quick run to the local shops and bought some vegetable oil. While I was there, I decided to buy three raspberry and vanilla cake rolls with the vague idea that they might make good towers for the castle.

Robert baked the cake in two round pans. While it was baking, he rolled out the ready-to-roll icing (I helped with this, because no matter how much icing sugar we put on the counter to keep it from sticking, it still kept sticking to the counter in places). Once it was rolled out, we rolled it around the raspberry and vanilla cake rolls and spent some time smoothing it.

Once the two round cakes were out of the oven and had cooled, Robert frosted & layered them with Betty Crocker's Vanilla Frosting. We could have also used ready-to-roll icing on this part of the cake to maintain a smoother surface, but some kids don't like ready-to-roll icing, so we thought that having different types of frosting on different parts of the cake would be best.

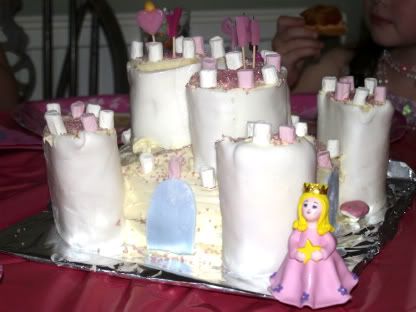
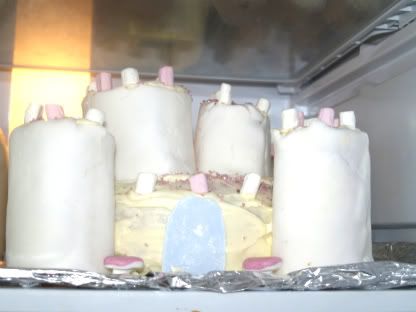
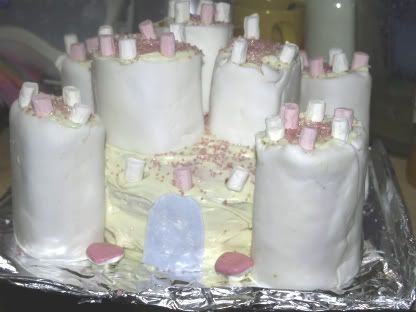
The "towers" were too tall, so we cut them into two, one piece 2/3 of the roll and one piece 1/3 of the roll. Using the frosting, we stuck the larger pieces to the sides of the frosted cake in four places. Then we also stuck three of the shorter pieces on top of the castle. We frosted the tops of the towers and added mini marshmallows around the edges by sticking them in the frosting (to make turrets).

Bellas 5th Birthday Party Princess Castle Cake


Robert kneaded some blue food coloring into the leftover ready-to-roll icing until the icing became light blue. Then he rolled it out and cut out windows and a door for the castle. We stuck them onto the "castle" using a very thin layer of the vanilla frosting.

I added two toadstool-shaped soft candies to the front of the castle and we put it in the fridge until it was time to bring it out so our little girl could blow out the candles.

Bellas 5th Birthday Party Princess Castle Cake1


We topped the cake with some princess candles.

Bellas 5th Birthday Party Princess Castle Cake2


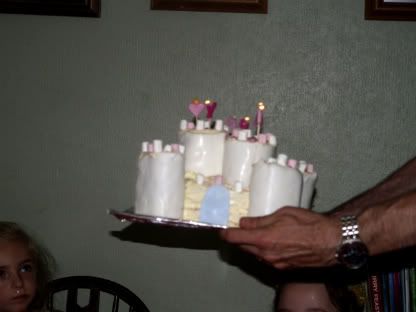
Then it was time to take the princess castle cake to the table.

Bellas 5th Birthday Party Princess Castle Cake3


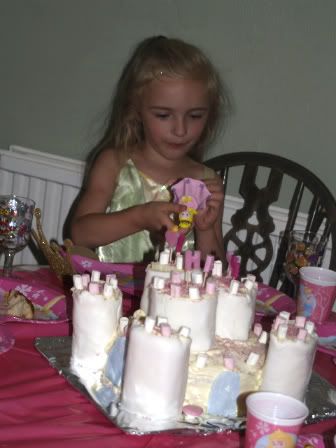
We had bought a little princess cake decoration to use, so we added it to the cake by standing her just outside the "castle" right after we set the cake onto the table.

Bellas 5th Birthday Party Princess Castle Cake5


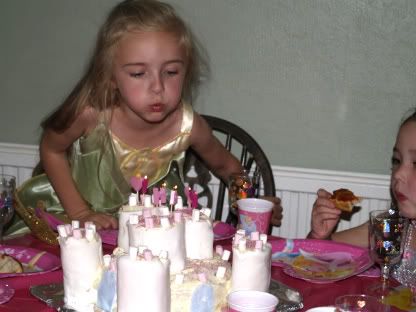
Then we sang "Happy Birthday," and our little five year old blew out the candles.

Bellas 5th Birthday Party Princess Castle Cake4


The cake was a hit and our daughter was very pleased!

Bellas 5th Birthday Party Princess Castle Cake7


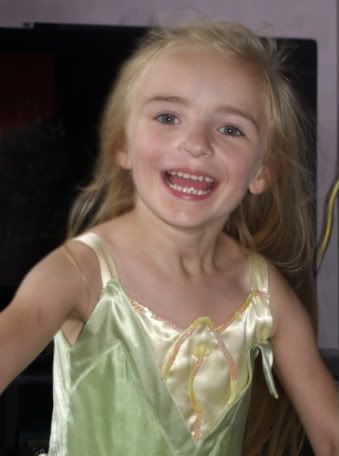
Bella smiles at her 5th Birthday Party


The only change I would have made, had I thought of it ahead of time, is that, to make the cake even more "princessy," I would have bought some pointy sugar cones and set them upside down on the tops of the towers and then "painted" them pink with some vanilla frosting that I would have mixed with red food coloring.

Another twist on this cake would be to buy some light blue cotton candy and bunch it around the bottom of the cake (as clouds) and then use little fairy cake decorations to make it a fairy castle in the clouds.

Saturday 7 August 2010

Buzz Lightyear Space Party

I met Marissa Reedhead many years ago on one of the forums I frequent at DelphiForums. She is not a mom of many, but she is a mom. She lives in a small northern town in Ontario with her husband and two children where she says they "pretty much have to make" their "own fun since there isn't much to do." She also lives with two cats Gabe and Jeremiah and a guinea pig named Norm. Marissa recently posted some photos on Facebook of her daughter's birthday party. When I saw all of the effort she put into creating such a great Toy Story Buzz Lightyear "Space" party for her daughter's birthday, I asked her if she would mind guest posting about it here. She graciously agreed.

I can't quite remember when I decided to forsake the ballerina theme for my daughter's third birthday but I believe it was around the time she really took a liking to Toy Story. Because this is the year the 3rd movie in the series was released, I figured it would be a perfect idea for a 3rd birthday. I always seem to go overboard when it comes to party or event planning and I usually stress myself right out before the party but I do enjoy getting everything ready.

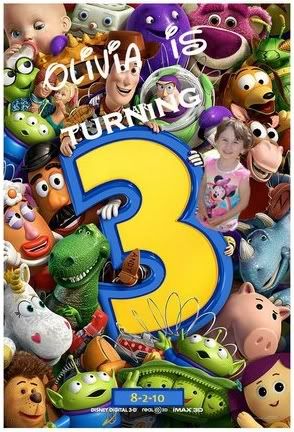
For the invitation, a friend of mine showed me a Toy Story movie poster she had modified and had added her son's name to it as well as the date of his birthday. She is doing the same theme herself and her son was born soon after Olivia. I imported the poster into Adobe Photoshop and downloaded a Pixar font and added her name and her birth date to the poster. Then I took a picture of her and cut her out and added her in amongst the toys, trying to make it look like she was one of them. She actually asked me if she was in the movie after seeing the picture. I narrowed down the theme further to a Space Ranger party in light of the fact that she loves Buzz Lightyear and had asked for a cake topper of him instead of Woody.

Toy Story Birthday Party Invitation


The invitation read:
On August 2nd, Olivia the space ranger is turning 3 years old and wants to invite fellow space rangers to join her for a galactic pool party. Space dock is at ***** and Docking will begin at 2 pm with food and fun to follow. Please send a subspace message to her mom at email or call on the old fashioned telephone to let us know if you can attend. Make sure to bring your space (bathing) suits towels and space chairs to insure your comfort on the journey.

After the invitations were sent out, it was time to start on planning the cake, cupcakes, loot bags and games. For loot bags I shopped at the dollar store, it's called Dollarama in our area and found lots of little stickers, tattoos, little toys and a candy. I did buy the more expensive official Toy Story loot bags but that's one of the only extravagant purchases I made. Most of her presents themselves were dollar store or thrift store purchases.

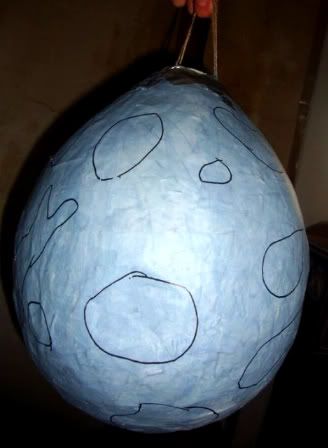
I also started on a piñata. I blew up a 12 inch balloon and used paper mache to cover it with newspapers. I used a mixture of 1 part flour to 2 parts water and cut the strips of newspaper into 2x3 inches. It took about 5 layers of newspaper before the piñata was solid enough to pop the balloon inside. It was quite easy to remove the balloon after cutting a hole in the top to add the candy. Then I painted it gray to coincide with the Space Ranger idea and drew craters on it and voila, we had an asteroid piñata. We also used silver duct tape to add the strings to the piñata so that we could hang it. Unfortunately the strings didn't hold, I'm not sure what would have been a better idea. Then we added tons of candy bought at a bulk store and taped the hole shut.

Toy Story Birthday Party Pinata


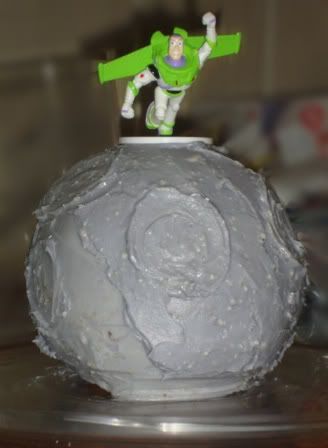
As for the cake, I consulted with a friend whom I consider to be a cake expert. She sent me a picture of a Buzz cake topper on a meteor and gave me some tips as to how to make it. I borrowed the Wilton 3D ball cake pan from her and used my favorite cream cheese butter cream icing from cakecentral.com. I also got my Wilton food coloring gel from her in black and green. The gel color is the best to use that I've found because it produces a vivid color without using much of the gel itself which can dilute the icing. I baked the cake using a boxed mix and iced it first with a thin coat of butter cream as a crumb coat. I let that set in the refrigerator for a few hours and then iced it again with a thicker coat. Then I sprayed a spoon with cooking spray and lightly pressed in the craters. I then dipped my fingers in cornstarch and smoothed the craters out.

Toy Story Birthday Party Cake


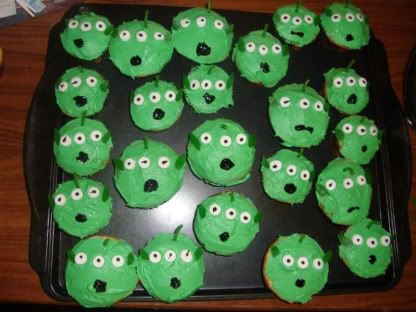
I also made Little Green Men cupcakes to surround the cake following the ideas of DisneyFamily.com.

Toy Story Birthday Party Martian Cakes


I couldn't have asked for better weather on the day of the party. It was hot and sunny and the kids loved playing in the pool and running around the backyard. In order to be accommodating to all my guests small and not as small (the age range was from 15 months to 6 or 7 years old), as well as to be fair to my special guest Emma who is undergoing treatment for a brain tumor, I had games that everyone could play. We had hot potato and a treasure hunt to look for aliens hidden in the back yard. For those, I printed a coloring page of the little green men, colored it and glued it to a piece of cardboard glued to a popsicle stick. I figured these could double as puppets. Along with the piñata, hot dogs, cake, cupcakes, watermelon and juice I think everyone had a blast including Miss Olivia who got many wonderful gifts.

Toy Story Party Birthday Girl

Wednesday 4 August 2010

Looking Into My Future

"Family faces are magic mirrors. Looking at people who belong to us, we see the past, present, and future."
~Gail Lumet Buckley

Photobucket


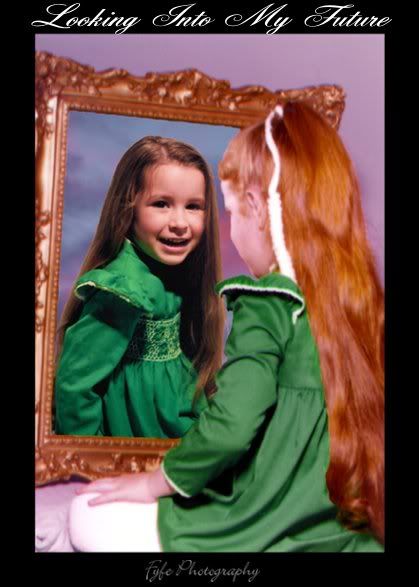
The reason I used this photo with the quote is because the little redhead looking into the mirror is me as a child, and the child looking back from within the mirror is my oldest child (back when she was about that age).

I created this photo manipulation years ago, and I thought other moms might like to try and make one of their own, so I decided to share it. It doesn't take a huge amount of photo editing skill. (I know it doesn't
because I am not particularly skilled.)

It does, however, mean you have to have a photo of yourself as a child looking into a mirror so that your face is showing. Not everyone will have a photo like this, but for those that do, they can make one of these generation pictures too! It also helps if you have a dress that your child can wear that is at least similar to the one you wore in the photo as a child and you'll need a mirror to take the photo of your child looking into.

I was fortunate in that my mom had saved the dress I wore in the photo as a child, and my sister took photos of my daughter in a similar pose at a similar age in the same dress.

The only cropping I had to do was of my daughter's face in the mirror in her photo. I then pasted it into the mirror in my photo and smoothed the edges to make it blend. I had previously tried this with a regular, non-mirrored image of my daughter and it didn't look right; it made the image in the frame look more like a photograph the child-me was looking at than a mirror. It had to be a reflected image of her that I used to paste into the mirror.

I then bordered the image and added the text.

I did use a little bit more skill in this than is needed to do this successfully. I actually cropped my daughter's image out, and before I pasted it, I added a photograph I had taken of a sunset sky to the background within the mirror. This isn't necessary for this picture, but it was an added touch I wanted to make. And there was also a lot of touching up that had to be done to the original scan of the photo of me as a child because it was a scan of a photograph that was old and had some of the fading and discoloration that can happen with age in photos.

The photography part of this might take a bit of effort and ingenuity, but once you've got the right photos, the rest is easy.

Sunday 1 August 2010

Teaching Our Children To Be Honest

Well, it's happened. My 7 year old and almost-five year old daughters have started lying to me.

I knew it would someday happen, though I still managed to hope it wouldn't. I knew that, despite my attempts to raise them to be honest, the lessons I tried to teach them about the importance of honesty, the example of honesty I tried to be for them, the church lessons they heard about lying being a sin, yes, I knew, this day would eventually come.

This is the second day this week I have caught them in a lie. The first time, I took the kids out for a walk and noticed that they all had paint on the backs of their legs. They tried to insist that they had been nowhere NEAR my paints, but the proof was in front of my eyes. And after I gave them a talk about how much more disappointed I was in the fact that they were lying to me and how much lying to me just made their transgression worse, they confessed.

And we had our first big after-the-lies talk about being honest and how horrible it is to lie to your parents. I really thought I got through to them as the tears of shame streamed down their faces and they apologized.

And then today happened. Even though I find it important to feed my kids in a healthy manner, occasionally, I allow them sweets or chocolate. (Having lost a lot of weight myself, I know that healthy food is important but that the occasional sweet is okay in moderation.) I bought some very low calories dessert sticks called Mikado Sticks as a treat for myself. It was a new flavor - dark chocolate, and the little box of cookie sticks dipped in chocolate contained 22 of these 10 calories sticks.

I have had two this week. I decided to have two more sticks today as it is a certain time of month and I was craving chocolate. I thought 20 calories of something sweet and chocolatey would be a safe way to feed my craving without losing control of my diet.

That's when I found out that the Mikado sticks were gone. They were nowhere to be found. Knowing that they ALL were under suspicion, my teenagers decided to help me look for the Mikado sticks. One of them remembered seeing my 7 year old acting suspiciously while being in the kitchen. I asked my 7 year old if she'd eaten my Mikado sticks and got a vehement denial that she had done any such thing. I asked the four year old with the same results.

One of my other teenagers decided to go investigate the seven year old's and four year old's room. That was where the empty Mikado stick box was found. Despite our discovery pointing to the two girls as the culprits, they still insisted they had not eaten my Mikado sticks. (My admittedly sarcastic thought to this was, so what? They built a playhouse out of them?)

I explained that I knew they were lying; that I was very disappointed to find them lying to me AGAIN, and that I thought they knew better than to lie to me ever again. I told them that they were grounded from having any sweets this week at all because they stole my Mikado sticks and that they were grounded from playing with their friends this week because they lied to me. I told them that lying was the worse of the two things they had done and that they were eroding any trust I had in the things they said every time they lied to me.

After realizing that she was caught and there was no way out of it, my seven year old admitted to having eaten the Mikado sticks, and the 4 year old admitted it too.

This time, the lies were also told to my husband, their daddy. He will have his own talk with them later. (He had been insisting to me that they couldn't have eaten the Mikado sticks because they had "never lied to" him before. Of course, he stopped insisting that once the box was found in their room.)

I am really sad that they have chosen to lie to me rather than face up to what they'd done. It's bad enough that they were sneaking food that didn't belong to them, but it is just so much worse that they then lied about it.

Did I handle the situation correctly? Despite the fact that I have seven kids and have been through this type of situation before with my older children, I can honestly say that I don't know.

How would you have handled it?